Introduction
High-Performance Biometric Integration for Web ApplicationsThe Biometric Web API SDK provides a complete, production-ready solution for integrating Futronic fingerprint scanners into any web application. The core of the project is a high-performance C++ Web API that runs as a local service on a client's machine, bridging the communication gap between the browser and the hardware.
This package is designed for flexibility. You can integrate the included JavaScript library directly into your existing projects (whether plain HTML/JS, React, Vue, Angular, etc.)
Core Features
- Standalone C++ Web API: A lightweight, self-contained executable (`webapi.exe`) that runs a local web server, exposing a simple RESTful API for fingerprint scanning. No complex server-side dependencies are required on the client machine.
- Flexible Frontend Integration: A modern, component-based JavaScript library that can be easily dropped into any new or existing web project to add fingerprint enrolment and verification UI.
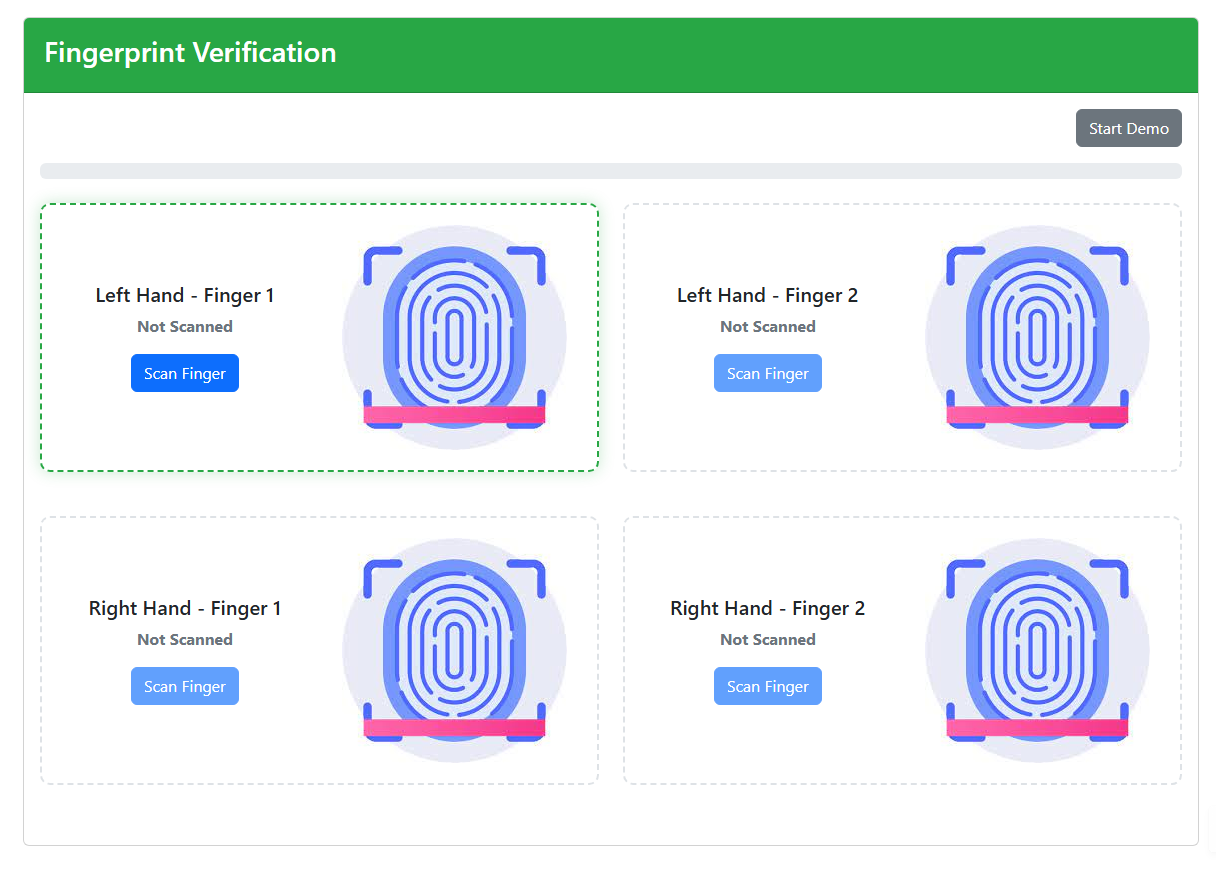
- Multi-Finger enrolment: A guided UI process for enrolling up to four fingerprints per member, significantly improving verification reliability.
- 1:N & 1:1 Verification: Supports both identifying a member from a large database by their fingerprint (1:N) and verifying a specific member's identity against their stored templates (1:1).
- Demo Mode: Test the complete enrolment and verification flow without a physical fingerprint scanner, perfect for development and demonstrations.
Features
- Seamless integration with Futronic fingerprint scanners.
- Web-based fingerprint enrolment.
- Web-based fingerprint verification against stored templates.
- Simple HTTP/JSON API for easy integration with any web technology.
- Demo mode for testing without a physical scanner.
- Cross-browser compatible frontend (modern browsers).
System Requirements
Prerequisites for SDK, Development, and frontend usageSDK Runtime Requirements (End-User Machine)
These are the requirements for the machine where the fingerprint scanning will occur.
- Operating System: Windows 10 or later.
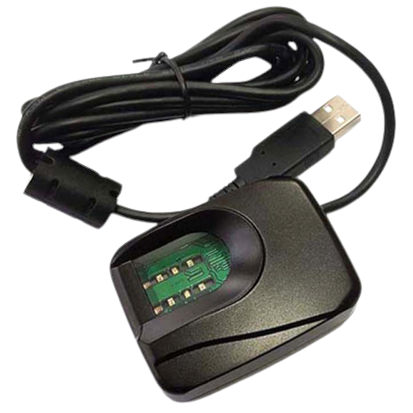
- Hardware: A compatible Futronic fingerprint scanner (e.g., FS80H, FS81H).
Development Requirements (Optional)
Only required if you wish to modify and recompile the C++ Web API SDK from source.
- Visual Studio 2022 or later (with C++ desktop development workload).
Video Tutorials
Watch our step-by-step video guides to get started.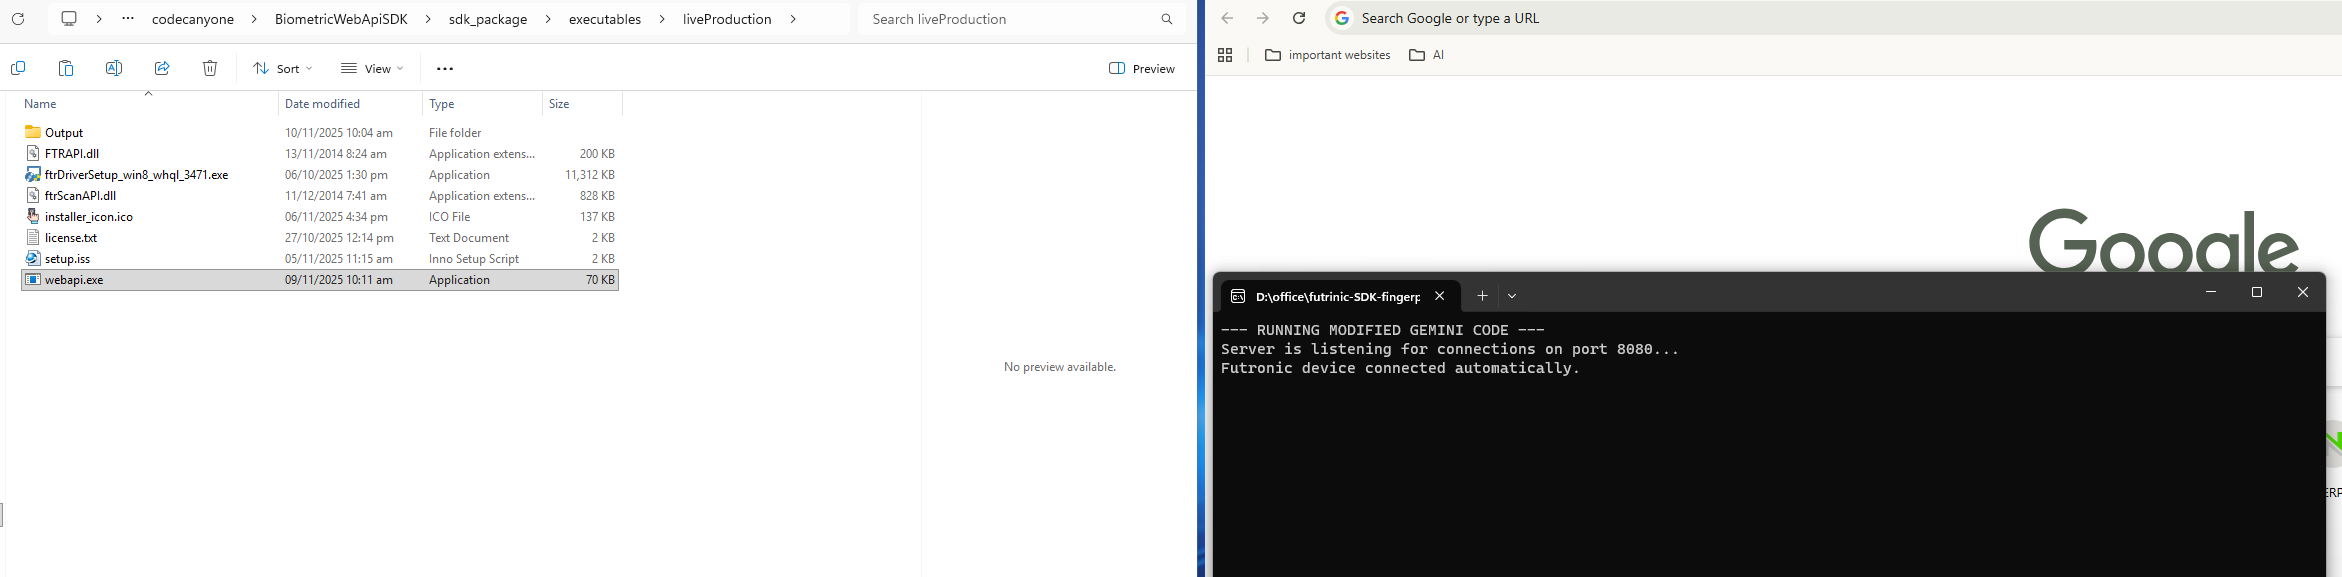
Installation & Setup
A complete guide on how to install the Biometric Web API service and get it running on your local machine.
Running the Demo
Learn how to use the included demo files to test both live and simulated fingerprint scanning.
Integrating with Your Project
A developer-focused tutorial on how to integrate the frontend library into your own web application.
Installation and Testing
Setting up and verifying the Biometric Web API serviceFollow these steps to install the local Web API service on the client machine and test it.
Step 1: Connect Your Scanner
Connect your Futronic fingerprint scanner to a USB port on your computer. Windows should recognize the device. While the installer includes drivers, it's best to have the device connected beforehand.
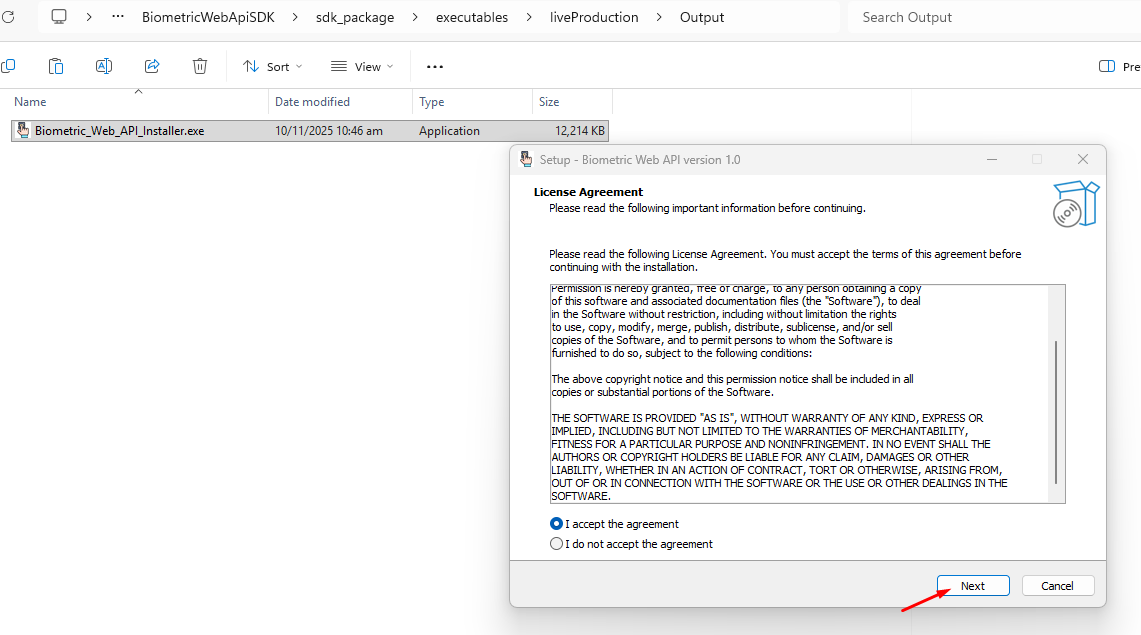
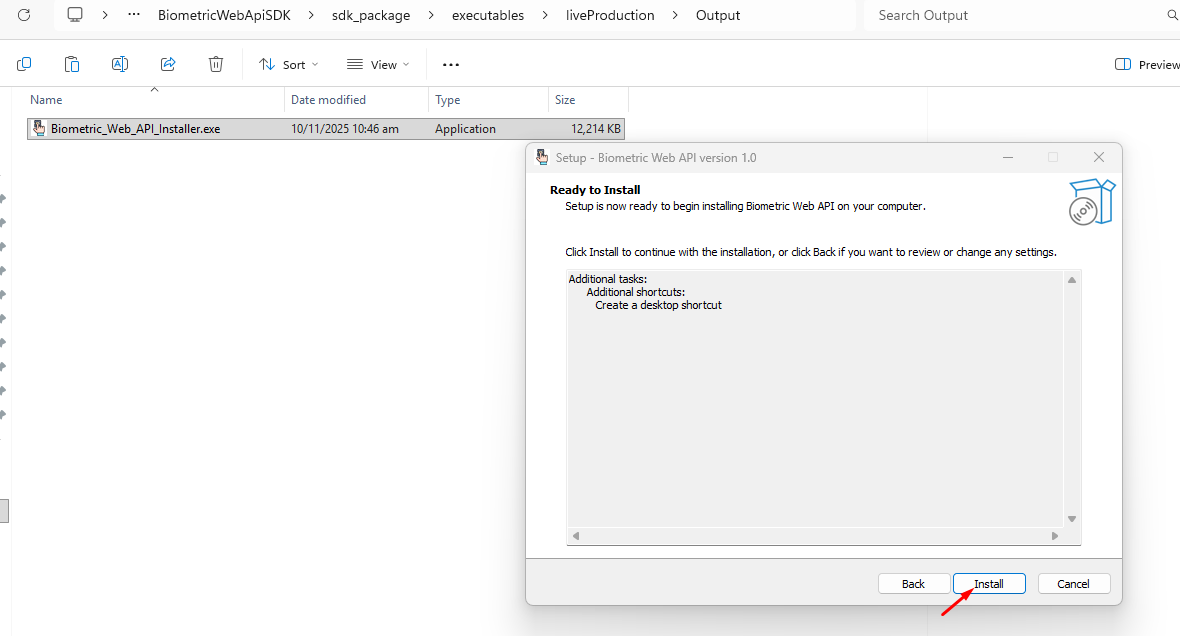
Step 2: Run the Installer
Navigate to the installer/Output/ folder and run Biometric_Web_API_Installer.exe. This installer will perform two key actions:
- Install the necessary Futronic device drivers.
- Install and launch the Biometric Web API service (`webapi.exe`).
Follow the on-screen prompts to complete the installation. You will need to accept the standard license agreement and confirm the installation path.
Step 3: Verify the Service is Running
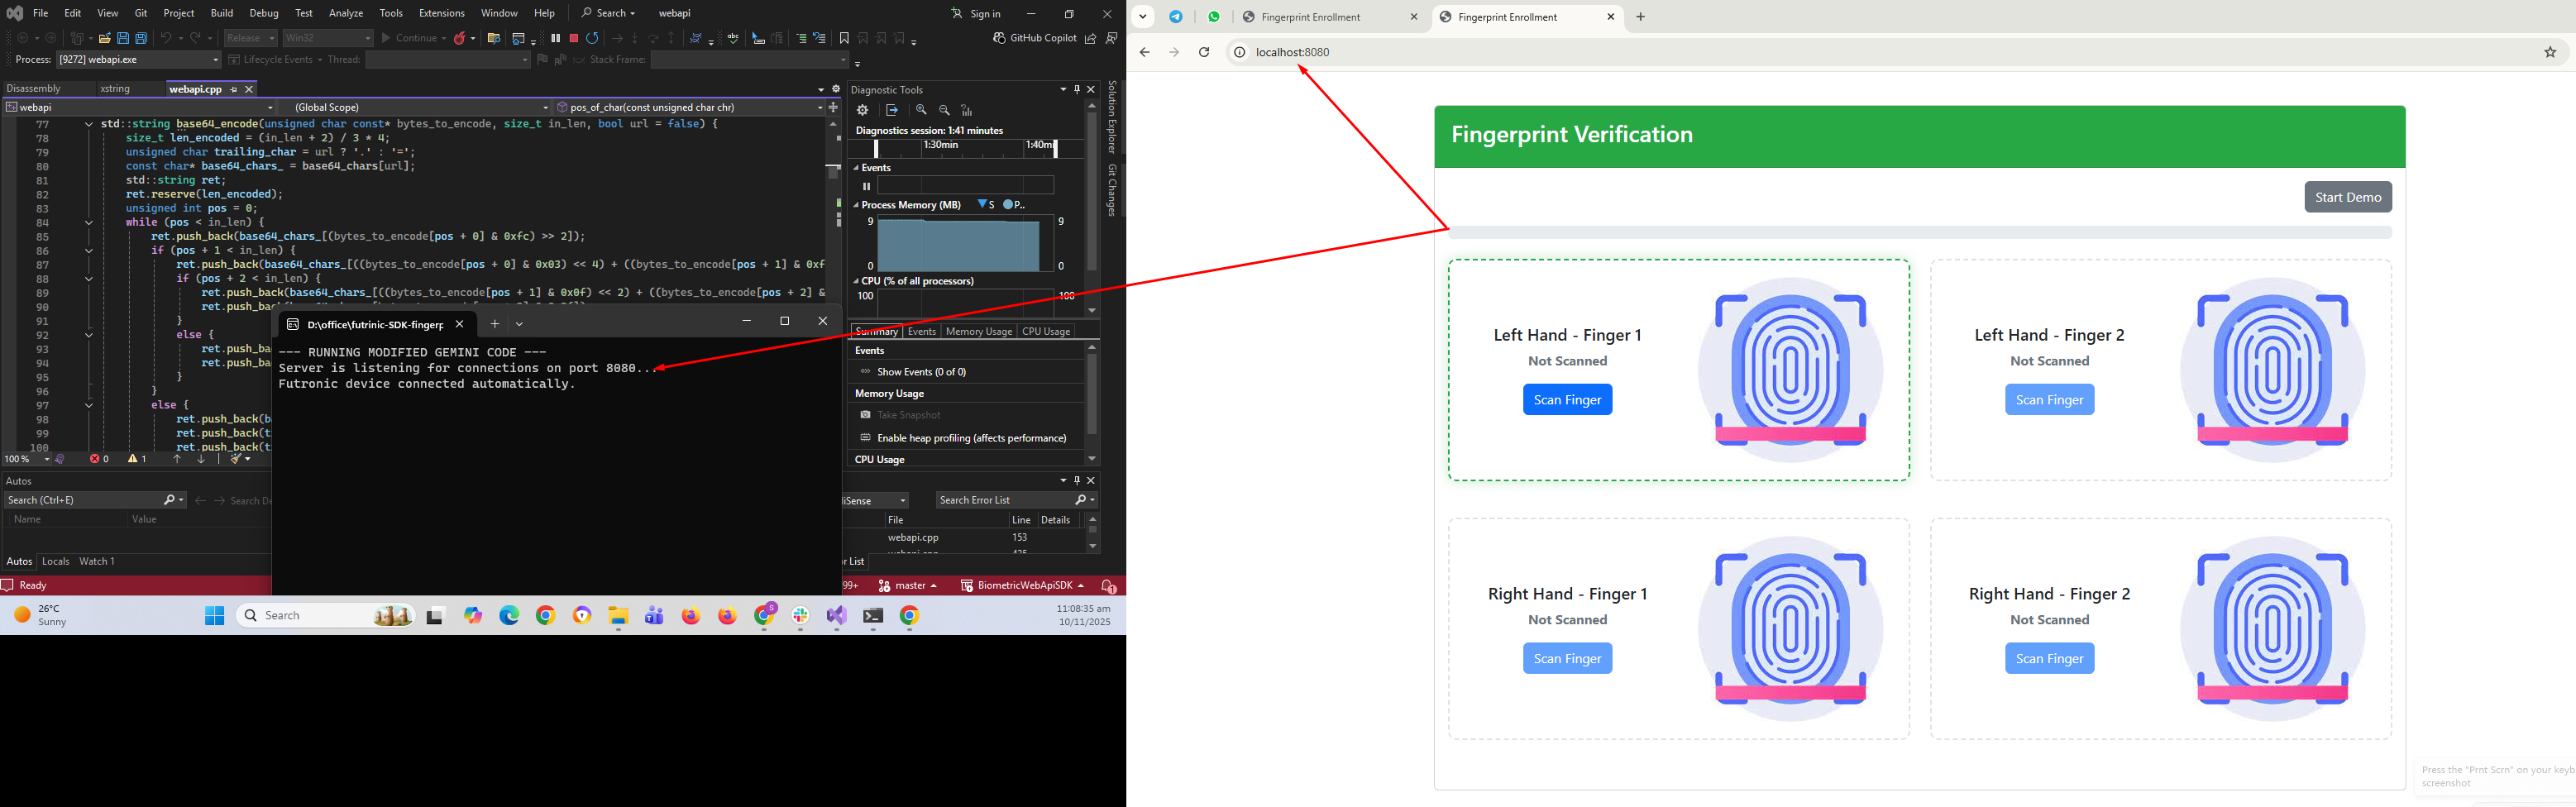
After the installation is complete, the Biometric Web API service will start automatically. You will see a console window appear. This window must remain open for the scanner to be accessible to web pages. It confirms that the local server is running and listening for requests on port 8080.
Congratulations! The local SDK environment is now set up.
Step 4: Test the SDK
We provide two simple HTML files to quickly test the functionality.
Testing with a Physical Scanner (Live Mode)
Navigate to the /src/frontend/ folder and open scan.html in your web browser. This page allows you to perform a full enrolment and verification cycle using your connected scanner.
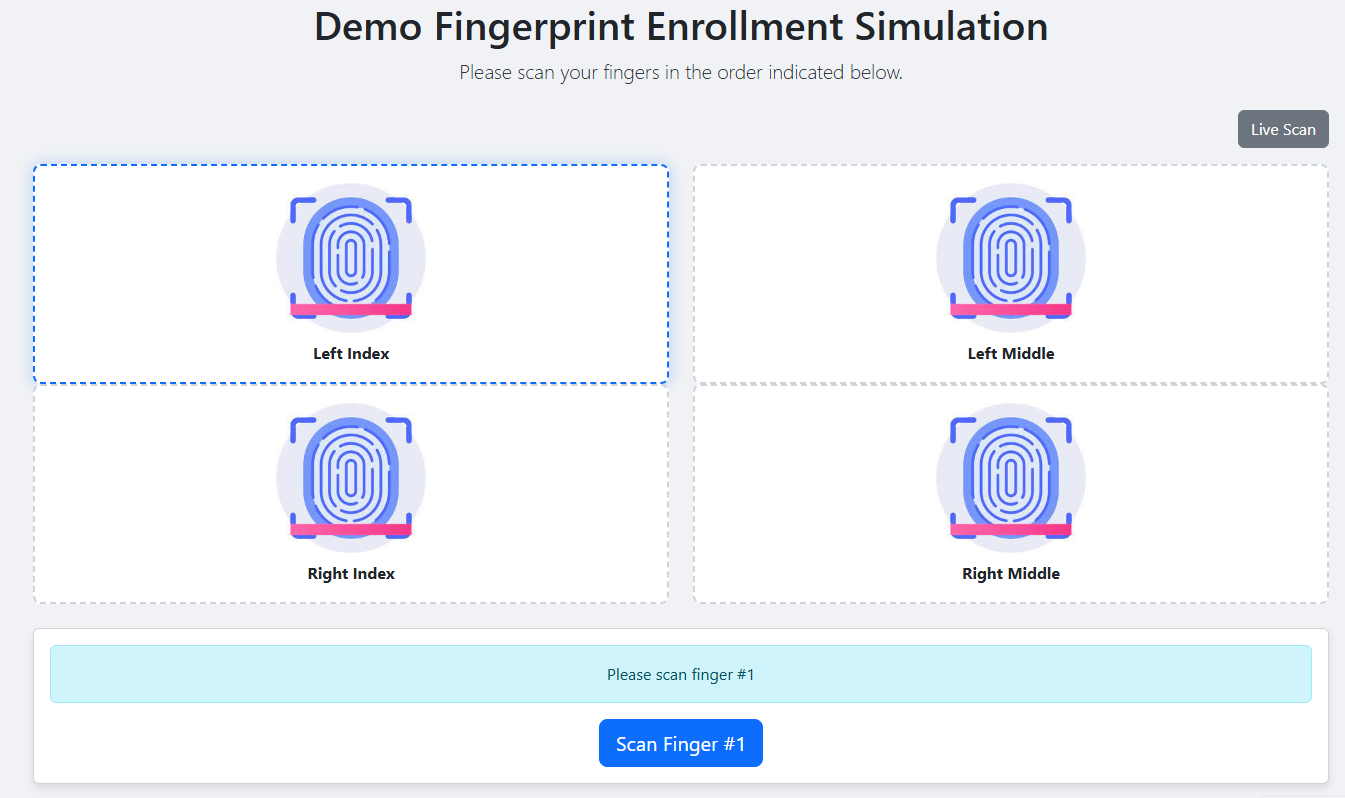
Testing without a Scanner (Demo Mode)
If you don't have a scanner, you can test the UI and application flow. Navigate to the src/frontend/ folder and open demoScan.html. This will simulate the scanning process.
C++ Fingerprint Web API (SDK)
Local service for scanner communication
The Biometric Web API is designed to simplify the integration of Futronic fingerprint scanners into web-based systems. It consists of a lightweight C++ server (webapi.exe) that communicates directly with the Futronic device and exposes a simple HTTP API.
It must be running locally on the client's machine to allow the web browser to communicate with the fingerprint scanner hardware.
Project Structure
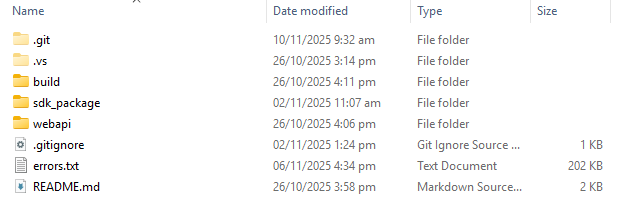
sdk_package/
├── CHANGELOG.md
├── LICENSE
├── README.md
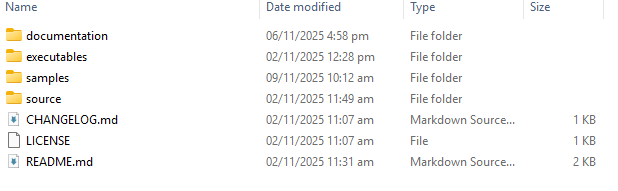
├── documentation/
│ ├── assets/
│ │ ├── css/
│ │ │ ├── lib/
│ │ │ │ ├── bootstrap.min.css
│ │ │ │ ├── bootstrap.min.css.map
│ │ │ │ ├── font-awesome.css
│ │ │ │ ├── line-awesome.css
│ │ │ │ └── simplebar.css
│ │ │ └── main.css
│ │ ├── fonts
│ │ ├── images/
│ │ │ ├── activation.png
│ │ │ ├── automatic_gateway.png
│ │ │ ├── dashboard.png
│ │ │ ├── favicon.png
│ │ │ ├── folderStructure/
│ │ │ │ ├── insideRoot.png
│ │ │ │ ├── insideSdk_package.png
│ │ │ │ ├── insideSdk_package=executables=liveproduction.png
│ │ │ │ ├── insideSdk_package=samples=documentation=docs.png
│ │ │ │ ├── insideSdk_package=samples=samples=laravel-biometric-web-api.png
│ │ │ │ ├── insideSdk_package=source=src=frontend.png
│ │ │ │ ├── insideSdk_package=source=src=server.png
│ │ │ │ ├── insideSdk_package=source=src=server=Release.png
│ │ │ │ └── insideSdk_package=source=src=server=biometric.png
│ │ │ ├── installation.png
│ │ │ ├── installerMakingForProduction/
│ │ │ │ ├── step1.png
│ │ │ │ ├── step2.png
│ │ │ │ └── step3.png
│ │ │ ├── productAppPackageSetup/
│ │ │ │ ├── step1.png
│ │ │ │ ├── step2.png
│ │ │ │ ├── step3.png
│ │ │ │ └── step5.png
│ │ │ ├── runExample/
│ │ │ │ ├── futronic.jpg
│ │ │ │ ├── requirements.gif
│ │ │ │ ├── sdkRunStep1.png
│ │ │ │ ├── sdkRunStep2.png
│ │ │ │ ├── sdkRunStep3.png
│ │ │ │ ├── sdkRunStep4.png
│ │ │ │ └── sdkRunStep5.png
│ │ │ ├── sdk/
│ │ │ │ ├── frontendDemoScanner.png
│ │ │ │ ├── frontendDemoScanner1.png
│ │ │ │ ├── frontendDemoScanner2.png
│ │ │ │ ├── frontendDemoScanner3.png
│ │ │ │ ├── frontendDemoScanner4.png
│ │ │ │ ├── frontendDemoScannerVerified.png
│ │ │ │ ├── frontendScanVerified.png
│ │ │ │ ├── frontendScanned1.png
│ │ │ │ ├── frontendScanned2.png
│ │ │ │ ├── frontendScanned3.png
│ │ │ │ ├── frontendScanned4.png
│ │ │ │ └── frontendScanner.png
│ │ │ ├── sdkBuildExample/
│ │ │ │ ├── step1.png
│ │ │ │ ├── step2.png
│ │ │ │ ├── step3.png
│ │ │ │ ├── step4.png
│ │ │ │ ├── step5.png
│ │ │ │ ├── step6.png
│ │ │ │ └── step7.png
│ │ ├── js/
│ │ │ ├── app.js
│ │ │ └── lib/
│ │ │ ├── bootstrap.bundle.min.js
│ │ │ ├── bootstrap.bundle.min.js.map
│ │ │ ├── jquery-3.6.0.min.js
│ │ │ ├── jquery.magnific-popup.js
│ │ │ ├── jquery.nice-select.js
│ │ │ ├── simplebar.js
│ │ │ └── slick.js
│ │ └── sass
│ ├── index.html
│ └── user_guide.md
├── installer/
│ ├── Output/
│ │ └── Biometric_Web_API_Installer.exe
│ ├── assets/
│ │ └── installer_icon.ico
│ ├── drivers/
│ │ └── ftrDriverSetup_win8_whql_3471.exe
│ ├── setup.iss
└── src/
├── frontend/
│ ├── biometric-scanner-lib.js
│ ├── demoFinger.bmp
│ ├── demoScan.html
│ ├── demoScan.js
│ ├── scan.html
│ └── scan.jpg
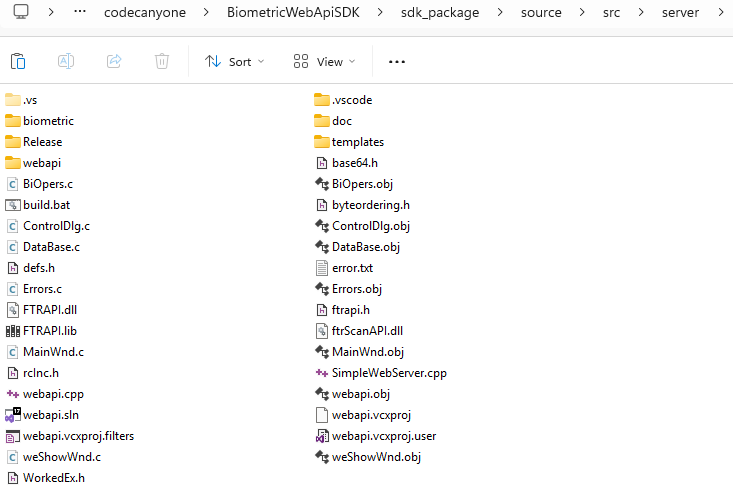
└── server/
|── lib/
| ├── FTRAPI.dll
│ ├── FTRAPI.lib
│ ├── ftrScanAPI.dll
└── cpp/
├── .vscode/
│ └── settings.json
├── BiOpers.c
├── ControlDlg.c
├── DataBase.c
├── Errors.c
├── MainWnd.c
├── WorkedEx.h
├── base64.h
├── byteordering.h
├── defs.h
├── Release/
│ ├── webapi.exe
│ ├── ftrScanAPI.dll
│ └── FTRAPI.dll
├── error.txt
├── ftrScanAPI.dll
├── ftrapi.h
├── rcInc.h
├── weShowWnd.c
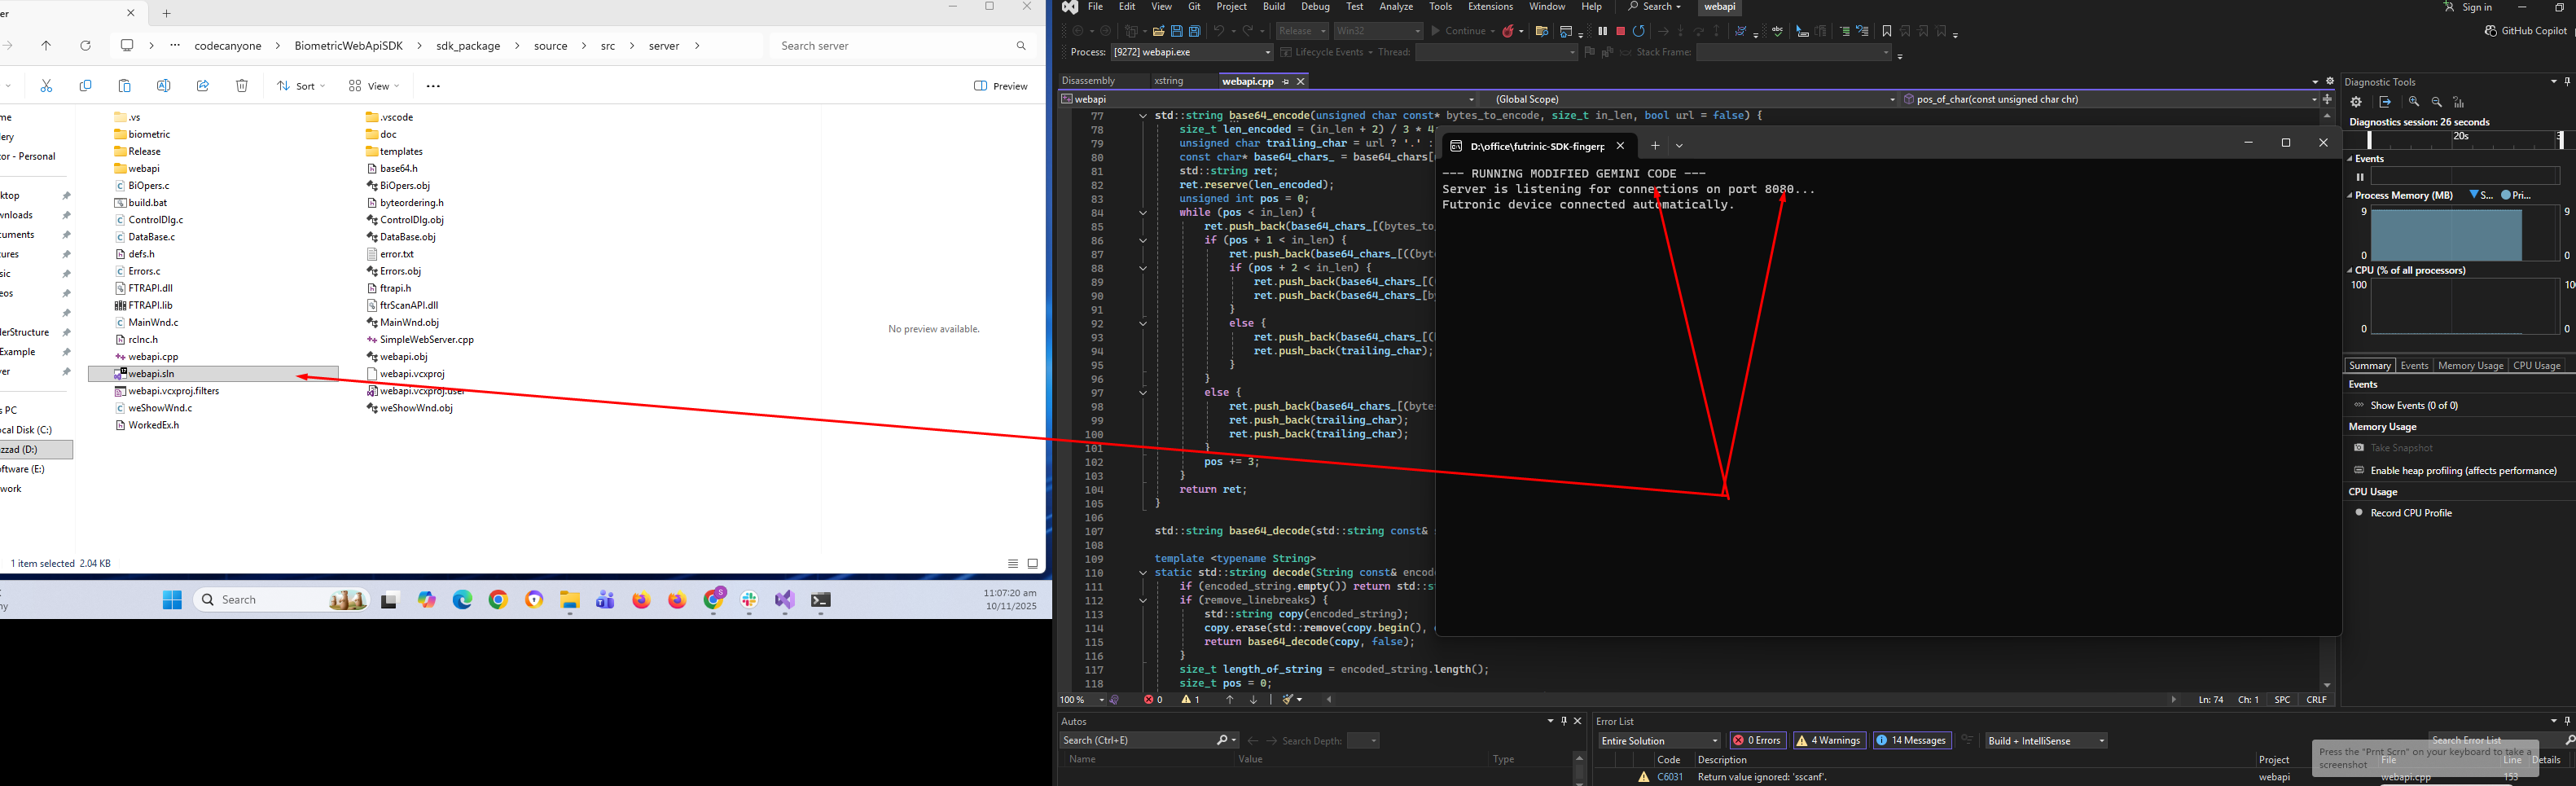
├── webapi.cpp
├── webapi.sln
├── webapi.vcxproj
└── webapi.vcxproj.filters
Getting Started (Manual)
Prerequisites
- Futronic Fingerprint Scanner: A compatible Futronic fingerprint scanner (e.g., FS80, FS88) connected to your machine.
- Windows Operating System: The backend server is compiled for Windows.
- Web Browser: A modern web browser (Chrome, Firefox, Edge).
- For Building: Visual Studio 2022 or later with C++ development workload installed.
Building the Backend (Optional)
If you wish to build the backend server from source:
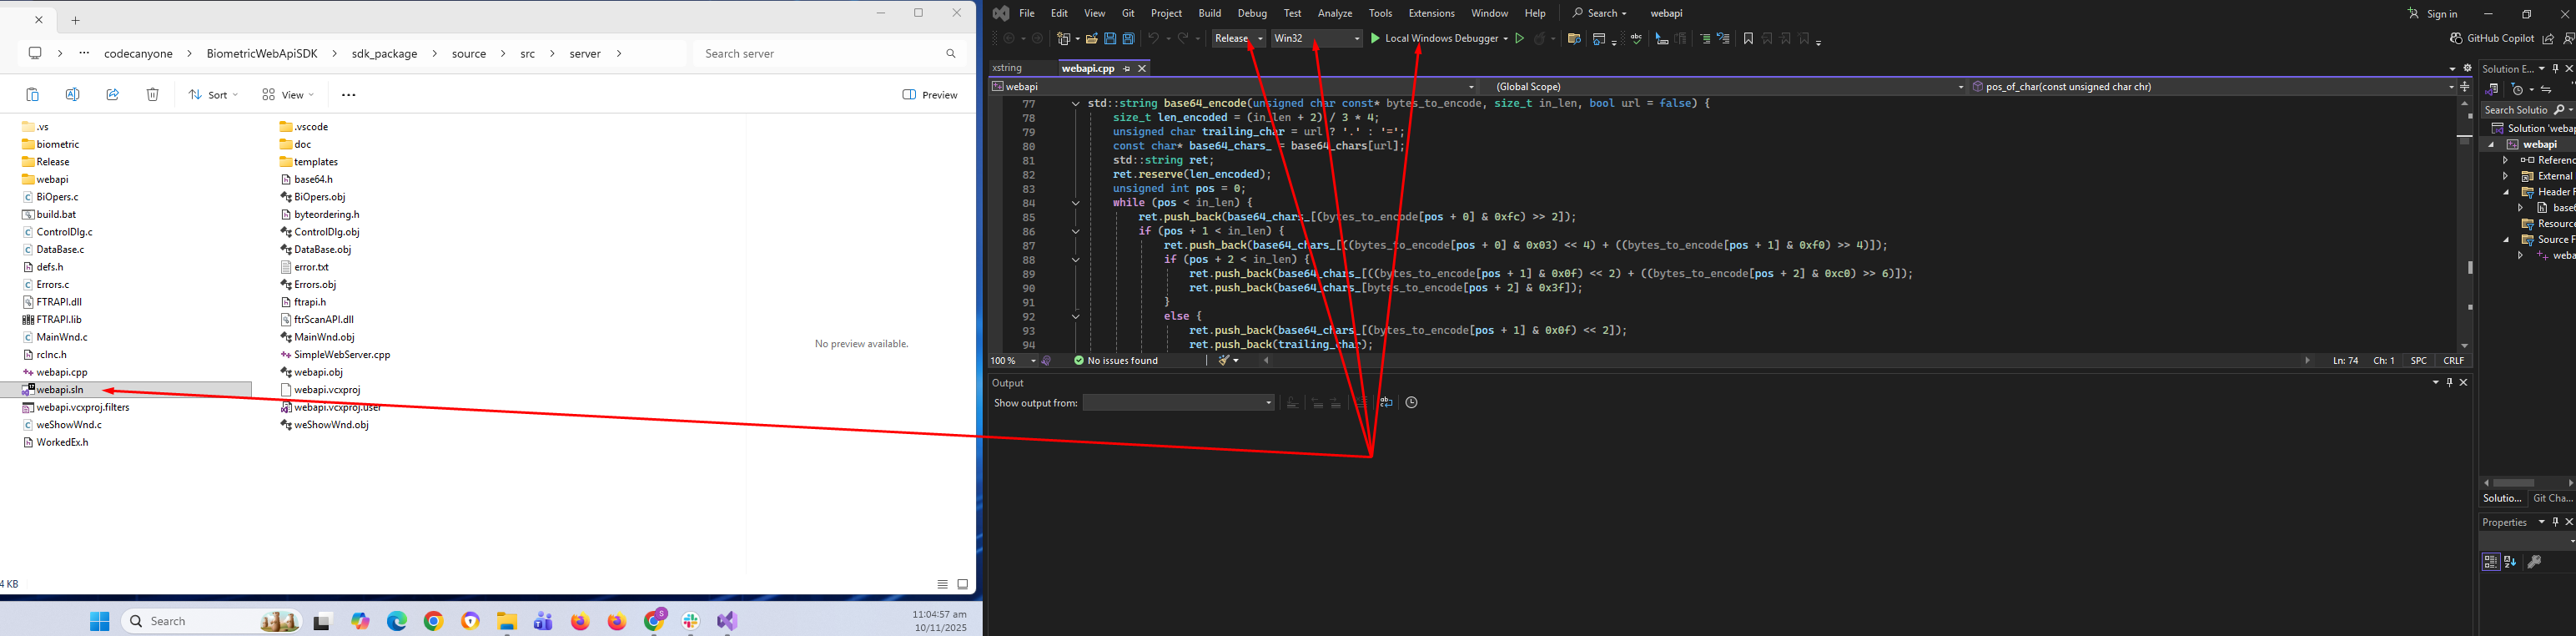
- Open Solution: Navigate to
src/server/cppand open thewebapi.slnfile with Visual Studio 2022 or later. - Select Configuration: In Visual Studio, select your desired build configuration (e.g., "Release") and platform (e.g., "x64").
- Build Solution: Go to
Build > Build Solution. - Locate Executable: The compiled
webapi.exewill be located insrc/server/cpp/Release.
Running the Application
- Connect Scanner: Ensure your Futronic fingerprint scanner is connected to your computer.
- Start Backend Server: If the application is not already running, launch it (e.g.,
webapi.exe). A console window will open, indicating that the server is running and listening on port 8080. - Access Frontend: Open your web browser and navigate to
src/frontend/scan.html.
API Reference
The backend server exposes the following RESTful API endpoints:
GET /api/scan/single
Initiates a single fingerprint enrolment process. The server will wait for a fingerprint scan.
- URL:
/api/scan/single - Method:
GET - Success Response:
application/json{ "success": true, "imageBase64": "data:image/bmp;base64,...", "templateBase64": "...", "message": "Optional error message" }
POST /verify_with_template
Verifies a live fingerprint scan against one or more provided fingerprint templates.
- URL:
/verify_with_template - Method:
POST - Content-Type:
application/x-www-form-urlencoded - Request Body Parameters:
template1(string, required): Base64 encoded fingerprint template.template2(string, optional): Additional template.- ... (up to any number of templates)
- Response:
application/json{ "success": true, "verified": true | false, "message": "Optional error message" }
Demo Mode
The frontend includes a "Start Demo" button. Clicking this button will simulate the fingerprint scanning process, generating fake fingerprint images and templates. This allows you to test the frontend's functionality and UI flow without needing a physical Futronic scanner connected.
If you don't have a scanner, you can test the UI and application flow. Navigate to the src/frontend/ folder and open demoScan.html. This will simulate the scanning process.
Frontend Usage
Using theBiometricScanner Class
The core of the frontend is the BiometricScanner class found in src/frontend//biometric-scanner-lib.js. It handles all the UI rendering and interaction with the API SDK.
Initialization
To use the scanner, create a div element and initialize the class in your JavaScript.
<!-- In your Blade file -->
                      <div id="scanner-container"></div>

                      <!-- In your JS -->
                      import BiometricScanner from './biometric-scanner-lib.js';

                      const scanner = new BiometricScanner('#scanner-container', {
                          verification: false // Set to true for verification mode
                      });
Customization Options
themeColor: (String) The primary color for UI elements. Defaults to#007bff.logoUrl: (String) URL for a logo to be displayed in the header. Defaults tonull.verification: (Boolean) Iftrue, the UI will be configured for a single verification scan instead of the multi-finger enrolment process. Defaults tofalse.
Handling Events
The component emits custom events to signal completion. You should listen for these events to get the scanned data.
enrolmentComplete: Fired after all four fingerprints have been successfully scanned in enrolment mode.verificationComplete: Fired after a successful scan in verification mode.
Advanced Examples
Integrating the scanner with LaravelFull enrolment Example
This example shows how to initialize the scanner for enrolment and submit the captured templates to a Laravel route.
<div id="scanner-container"></div>
                    <form id="enrollForm" action="/members" method="POST" style="display:none;">
                        @csrf
                        <input type="hidden" name="name" value="John Doe">
                        <input type="hidden" name="email" value="john.doe@example.com">
                        <input type="hidden" name="template1" id="template1">
                        <input type="hidden" name="template2" id="template2">
                        <input type="hidden" name="template3" id="template3">
                        <input type="hidden" name="template4" id="template4">
                    </form>

                    <script>
                        const scanner = new BiometricScanner('#scanner-container');

                        document.addEventListener('enrolmentComplete', (e) => {
                            const scannedData = e.detail.scannedData;

                            // scannedData contains { left: [data1, data2], right: [data3, data4] }
                            document.getElementById('template1').value = scannedData.left[0].templateBase64;
                            document.getElementById('template2').value = scannedData.left[1].templateBase64;
                            document.getElementById('template3').value = scannedData.right[0].templateBase64;
                            document.getElementById('template4').value = scannedData.right[1].templateBase64;

                            document.getElementById('enrollForm').submit();
                        });
                    </script>
Full Verification Example
This example shows how to handle a verification scan and display the result from the server using Axios.
<div id="scanner-container"></div>
                    <div id="verification-result"></div>

                    <script>
                        const scanner = new BiometricScanner('#scanner-container', { verification: true });

                        document.addEventListener('verificationComplete', async (e) => {
                            const template = e.detail.template;
                            const resultDiv = document.getElementById('verification-result');
                            resultDiv.innerHTML = 'Verifying...';

                            try {
                                const response = await axios.post('/verify', {
                                    template: template,
                                    _token: '{{ csrf_token() }}' // Add CSRF token
                                });

                                if (response.data.success) {
                                    resultDiv.innerHTML = `<h3>Success</h3><p>Welcome, ${response.data.member.name}!</p>`;
                                } else {
                                    resultDiv.innerHTML = `<h3>Failed</h3><p>${response.data.message}</p>`;
                                }
                            } catch (error) {
                                resultDiv.innerHTML = `<h3>Error</h3><p>An error occurred.</p>`;
                            }
                        });
                    </script>
Troubleshooting
Common Issues & SolutionsIssue: The scanner UI shows "Local Service Required".
Solution: This means the frontend JavaScript could not connect to http://localhost:8080. Ensure the webapi.exe from the executables directory is running on the client machine.
Issue: Fingerprint Scanner Not Detected.
Solution:
- Ensure the scanner is properly connected via USB.
- Reinstall the Futronic SDK drivers (
ftrDriverSetup_win8_whql_3471.exe). - Check device manager for any issues with the scanner.
Security
Important Security ConsiderationsLocalhost Binding
The Biometric Web API service (`webapi.exe`) is designed to be secure by default. It binds exclusively to `localhost` (`127.0.0.1`), meaning it will only accept connections from the same machine on which it is running. It is not accessible from the local network or the internet, which significantly minimizes its attack surface.
Input Validation
All data sent to the C++ backend service is strictly validated. The `/verify_with_template` endpoint, for example, checks to ensure that the provided templates are well-formed and within expected parameters before processing them. This helps protect against common vulnerabilities such as buffer overflows or denial-of-service attacks that could result from malformed input.
Data Transmission
Fingerprint templates are transmitted between the frontend and the local service as Base64 encoded strings. Since this communication happens entirely on the local machine (from the browser to the local service), the risk of data interception by a third party is minimal. For applications requiring an additional layer of security, we recommend that the host web application (your main website or app) is served over HTTPS. While the local service itself uses HTTP, the primary connection to your server should be encrypted.
Third-Party Notices & Licenses
Disclaimer and Important InformationFutronic Components
This SDK utilizes official drivers and certain library files (`.dll`) from the free SDK provided by Futronic. Our product acts as a bridge to make these components accessible and easy to integrate into web applications.
- The Futronic drivers and SDK components are the intellectual property of Futronic Technology Company Ltd.
- The use and redistribution of these components are subject to the license agreement provided by Futronic. It is your responsibility to review and comply with their terms.
- This product does not claim ownership of the Futronic drivers or SDK files. We are providing a custom-built integration solution.
- For the original drivers, SDK, and license agreements, please visit the official Futronic website: https://www.futronic-tech.com/
Disclaimer of Warranty
The Futronic components are provided "as is". While we have built our SDK to integrate with them, we do not provide a warranty for the performance, reliability, or suitability of the Futronic drivers or DLL files themselves. Any support requests related to the core functionality of the Futronic hardware or drivers should be directed to Futronic.
Support
Support information detailsIf you encounter any issues or have questions, please refer to the CodeCanyon support page for this item or contact the author directly.
Project Gallary
Screenshots of the project